

Solve the problem Can't connect to this network in Windows 10
One of the problems facing Windows 10 users is the appearance of the problem Can't connect to this network, which means that the computer or laptop cannot connect to the Internet network "Wi-Fi" that you have chosen. Follow us in the following lines as we will provide you with the solutions followed to get rid of this problem and solve it permanently without using programs on your device.
Solve the problem Can't connect to this network:
1- Restart the router:
The first obvious solution to this type of problem is to restart the router that you connect to the Internet from. Press the power button on the back of the router, preferably leave the router off for a minute, then press the power button to turn it on. The problem of not being able to connect to the network will most likely be solved after this simple step.
2- Forget the Wi-Fi network:
This solution succeeds in solving most Internet problems on laptops, the most important of which is, of course, the appearance of the message Can't connect to this network. All you have to do is go to Windows 10 settings, go to the Network & Internet section, and from the side menu, click on Wi-Fi, then click on Manage known networks from the right side as in the following image.

From the next page, click on the Wi-Fi network you are trying to connect to, then click on the Forget button as shown. After that, click on the Internet icon next to the Windows clock and click on the Wi-Fi network and type its password, and it will be connected without any problems or messages appearing.

3- Delete Network Adapter definition:
If you have implemented the first and second solutions and you cannot get rid of this problem and the message still appears to you when trying to connect to the Wi-Fi network, you should delete the Network Adapter driver installed on Windows and make the operating system install it in the mode it wants “the best mode”. To do this, you should enter Device Manager by pressing the Windows button + the letter X button on the keyboard at the same time, and from the menu that will appear, click on Device Manager, where a list of all the hardware drivers on your device will appear as in the following image.

After that, we search for Network Adapters, then click on it with the mouse, then right-click on the Wi-Fi definition as shown, then click on the Uninstall device option. After that, restart the device so that the system recognizes the changes you made and adjusts the settings correctly, and Windows will install the Network Adapter definition again and the Can't connect to this network problem will be solved.
4- Update the Network Adapter definition:
This is done by downloading a new version of the Network Adapter definitions, as the reason for the Can't connect to this network problem is likely that the definition installed on the laptop is old and needs to be updated. In this case, you must use another computer connected to the Internet in order to download the update of the Internet definitions for your device. You can download the definition through the official page of the device manufacturer and search for the definition and download it. After that, you can transfer the definition to your device and install it on it, then restart the system.
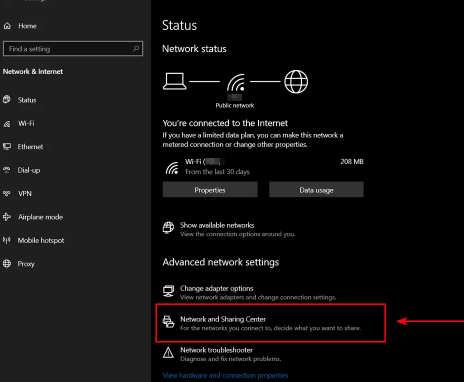
5- Connect to the Internet manually:
If all the previous solutions do not work, you can connect to the Internet manually. You can do this by going to Windows Settings, going to the Network & Internet section, and then clicking on Network and Sharing Center.
Then we click on Set up a new connection or network, where a new window will open containing several options, and from it we click on the option called Manually connect to a wireless network as in the following image, then we click on the Next button.

After that, you will be transferred to another window, in which we write the network data you want to connect to, such as Network name and Security key, i.e. the network password, then finally we click on the Next button at the bottom and wait a little, and Windows will connect to the Internet and solve the problem.
For people who use Windows 7, the problem that appears is called Windows was unable to connect to this network, and the solution is to follow the steps above as well. You can also follow the method of solving the yellow triangle problem for the Internet permanently for all Windows systems.