How to Use EmuDeck to Add Emulated Games to Your Steam Deck Library
Important lessons learned EmuDeck makes it simple to access classic games from your Steam Library by automating the installation of emulators on a variety of platforms.
EmuDeck can run games from the PS2 and Wii, although it can be challenging to get certain later systems to function.
You can use more Bluetooth controllers to play multiplayer games and add support for retro achievements.
Emulation is a terrific way to play a range of games from classic systems on portable gaming handhelds like the Steam Deck. EmuDeck allows you to display your emulated games next to your normal Steam library and start them without opening an additional emulator.
What Does EmuDeck Stand For? In essence, EmuDeck is an installer software that quickly and easily installs and configures a range of emulators for different gaming systems.
It does this by launching an installation script that searches for the optimal emulators for every system that is available, installs them straight into your Steam library, and makes them easily accessible.
What EmuDeck Can Be Used For?
EmuDeck can run nearly everything on a Steam Deck, with little performance issues ranging from the first home systems to the PS2 and Wii. It can run some Switch and Wii U games as well, though game selection will mostly determine how well it performs. These systems are more difficult to emulate and demand a lot of hardware.
Although PS3 emulation is technically achievable and available as an installation option with RPCS3, its legendary complexity makes it difficult to get working effectively. Having said that, practically everything else runs perfectly on a Steam Eck with EmuDeck installed, sometimes even outperforming the original hardware. EmuDeck is therefore the ideal choice if you want to build your own portable retro game system.
Do not Stress About Trying to Find the Correct Emulators Given the abundance of emulators available, it can occasionally be difficult for someone new to emulation to decide which ones to use.
Fortunately, EmuDeck's installation procedure completely eliminates this dilemma by identifying and setting up the most dependable emulators for every machine on its own.
The install script will automatically locate each emulator for each console from the SteamOS Discover store or the emulator's website when you run it on your Steam Deck or other portable device.
Still, you do have some say in which emulators are installed. Since there are many alternatives, I would advise selecting only those that are made for the platforms that you truly wish to use. It is easy to add more emulators later on; just launch the EmuDeck application in Desktop Mode and choose the emulators you are lacking. It is simple!
Before Beginning to Use EmuDeck
Although it would not be ideal, you could theoretically accomplish everything with just the handheld, the requirements for using EmuDeck are rather low. Obtaining a USB-C flash drive to transfer data from a PC to the device is advised because downloading content directly from the Deck might be time-consuming.
To prevent overcrowding your storage with emulated games, it is also a good idea to have a microSD card dedicated to emulation, even though it is not as important as a flash drive. Depending on how much capacity you might require, there are several excellent microSD possibilities, but an A2 microSD card from SanDisk is a fantastic choice.
How to Install EmuDeck
Once your microSD card is ready, use the Steam button, Power, then Switch to Desktop to boot your Steam Deck into desktop mode. Now launch a web browser, go to EmuDeck.com, click the link to download the EmuDeck installer for SteamOS, save the installer to a location where you can access it (you may want to run it again later), and launch it.
Once you confirm that you want to run it, the installer will download and install the required files. From here, you can customize EmuDeck to your preference by following the on-screen directions.
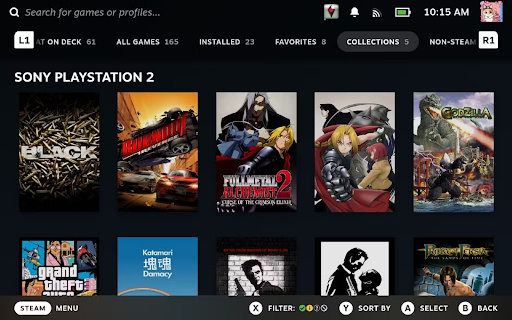
Adding Games in Emulation to Your Steam Collection
One of my favorite things about EmuDeck is that you can add emulated games—complete with box art—straight to the Steam Library. This means you can boot into games straight from your library just like any other game, without having to manually launch an emulator and load ROMs or ISO files.
Naturally, it is your responsibility to ensure that, in regards to emulated games, you are abiding by the law. Adding ROMs is rather easy, assuming you know the legislation. Although EmuDeck has an automated technique for detecting ROMs from USB-C flash drives, just to be cautious, I would advise doing it manually.
Transfer ROMs to a USB flash drive folder and place it within your Steam Decj. The files can then be copied and pasted into the appropriate system folder, which will appear wherever EmuDeck was installed.
(under Emulation > Roms > System Name).
Moving files around in Desktop Mode can be a little difficult with the touch screen controls, so I suggest using an external mouse and keyboard.
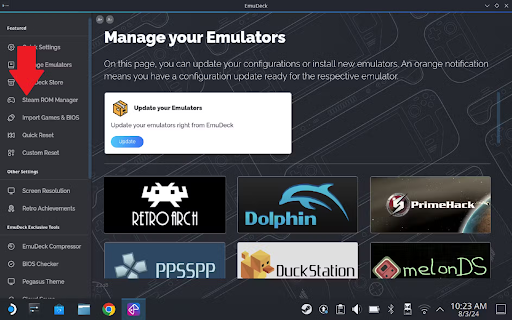
When it is finished, launch the EmuDeck application in Desktop mode and choose "Steam ROM Manager." If a pop-up box shows up, click "Yes" to open the "Parsers" page, where you can choose which emulators to add to your Steam library—something I strongly advise doing so that you can quickly adjust settings at a later time.
As long as you place the games in the correct folder, you may view a list of all the games you have added by clicking the "Add Games" button in the bottom left corner.
After you have made all the selections you want, click "Save to Steam," and all of your installed games ought to be parsed and added to your Steam library automatically.
Easy expansion, quality of life features, and multiplayer
You can start playing retro games now that you have added your collection and made sure each game is there. As enjoyable as it may be to play them on-the-go, you can also replicate playing on the actual thing with a dock and a Bluetooth controller (or multiple).
If the game you are playing has multiplayer features, you can play with your friends by connecting several Bluetooth controllers. The integration is quite smooth, albeit you might need to activate some settings, like "Multitap" in PCSX2, if there are more than two players.
Since emulators typically permit save states by default, they are also a given. EmuDeck goes above and above by automatically creating button mappings for state saving and loading. Custom keybindings are available for loading and saving states. change between different files. and remove any unskippable cutscenes or lengthy load times.
It is very easy to expand EmuDeck; all you have to do to add new games is place the files into the appropriate emulation folder and let the application take care of the rest. With just an internet connection and the EmuDeck application in Desktop Mode, you can easily install new emulators and update existing ones.
Provide Support for Retro Achievement (Optional)
RetroArch, which facilitates integration with RetroAchievements—a project that adds achievements to retro games so you can brag about your accomplishments—is also compatible with EmuDeck. EmuDeck should install RetroArch automatically, but in order to play it in desktop mode, you might need to add it to your Steam collection as a non-Steam game.
When it is prepared, simply navigate to Settings > Achievements in RetroArch and provide your RetroAchievements website login information. Currently, the majority of emulators that utilize RetroArch ought to monitor your advancement and grant you with achievements automatically. RetroArch is not compatible with some systems, such as the PS2, so you will need to use the appropriate emulators to enable achievements on those platforms.
It is now easier than ever to transform the Steam Deck into the best vintage gaming system with EmuDeck. You can start playing your favorite oldies from practically anywhere with just a few easy steps and your very own retro gaming device at your fingertips.