

How to disable laptop camera in Windows 10
Most laptops have a front camera that is used to make video calls in many communication programs such as Skype , Facebook Messenger, and others.
On the other hand, some of us sometimes need to disable the built-in camera of the laptop for many reasons, and the most important of these reasons is certainly to protect privacy while using the Internet, as security threats have spread that target operating the laptop camera and photographing you without you knowing.
Today we will provide you with the best way to disable the laptop camera without using any programs and through the device's settings, whether you are using Windows 7 , Windows 8, Windows 10 , or even Windows 11.
Disable the laptop camera from the settings:
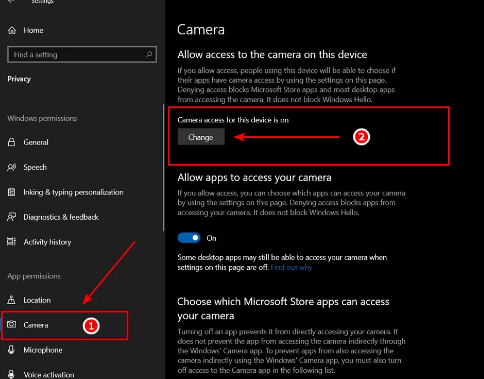
The first method is through Windows Settings, where we will press the Windows logo button + the letter i button at the same time on the keyboard, in order to open the Settings window, and then we go to Privacy, then we click on Camera from the side menu, then from Camera access for this device is on we click on the Change button, then from the small window that will appear we will make it in the Off position.
After applying these steps, the programs and applications installed on your device will not be able to access the laptop camera at all, and thus no one will be able to operate it without your knowledge.
Disable laptop camera from Device Manager:
First, we will enter Device Manager by searching for it in the Windows search in the taskbar or by pressing the Windows logo button + the letter R button at the same time, where the Run window will open, in which we type the command devmgmt.msc and press the OK button, and thus the Device Manager window will open.
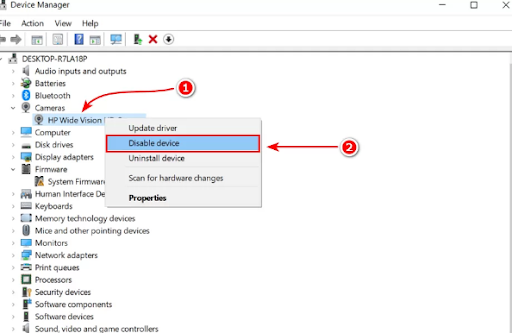
Then go to Cameras and click on it with the mouse to show you the camera of your device, whether it is the camera built into the laptop or even the external camera connected to the device if there is one. After that, we will right-click on it and then click on Disable device as in the following image.
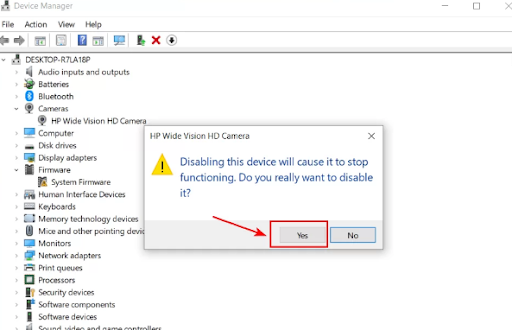
A warning message will appear, from which you must click the Yes button to stop the camera from working, after which Windows may ask you to restart.
If you want to restart the camera again later, you can go to Device Manager and repeat the same steps, but you will click on Enable device to get the camera working again.