

6 Featured Folders to Improve Your Windows Experience
There are several distinct folders on Windows that you can use to reduce the time you need to complete something while using your device, and benefit from these folders to obtain several advantages such as running a specific application as soon as you start using your device or knowing all the programs that have been installed on your device and need to be at the beginning of the Start menu, and in this article you can learn the importance of several distinct folders and follow the steps in order to apply them to your device.
Featured folders that can improve your Windows experience
Automatically launch applications when your device starts using Shell:Startup :
Using the following steps for Windows 10 or 11, you can automatically launch some applications of your choice as soon as you start using your device so that you can start using the application immediately.
- Open the Start menu and find the app you want to launch as soon as you start using your device.
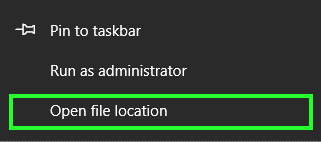
- Right-click on the application and click Open file location. If this option is not available, this indicates that the application cannot be run directly with the device turned on.
- Right-click and choose Create shortcut to create a shortcut for the application as shown in the image. In the window that will appear, click Yes.
- Press Windows key + R to open Run window and type shell:startup then ok.
- From that window you will see shortcuts to the applications that work immediately after opening the device, and after opening it you can copy the shortcut of the application you want and paste it into that window.

- Open the Start menu, left-click on the application you want to create a shortcut for, drag it to the desktop, and the application shortcut will appear in front of you.
- Following the same steps as Windows 10, open the Run window, type shell:startup, and click OK.
- Copy the application shortcut and paste it into the window that appears in front of you for the applications that will run as soon as you open your device.
- If more than one person is using the device, typing shell:common startup will show you the applications that run after the device is opened, regardless of who is using the device.

Modify application locations in the Start menu using Shell:Programs:
There are several distinct folders, this is one of the most important, and you can use it to place some applications at the beginning of the Start menu or delete applications that you do not want to be in the list easily.
- Open the Run window and type Shell:Programs then Ok and you will see a list of all the applications in the Start menu.
- If you want to show an application at the top of the list of applications in the Start menu, modify the name of the application and put an exclamation mark ! at the beginning of the name.
- If you do not want an application to appear in the applications list, you can delete its shortcut from the window and it will be deleted from the list.
- You can also use it if you want to create several distinct folders that contain applications inside them so that you can open the applications from within the folder in the Start menu, such as the Microsoft Office folder and its applications, as shown in the picture, provided that the folder contains more than one application, not just one application.


Create application shortcuts using Shell:AppsFolder:
You may not be able to create shortcuts for certain applications in any of the known ways such as right-clicking and choosing the option to create a shortcut or dragging the application from the Start menu to the desktop until the shortcut is created. Here you can rely on one of your options to facilitate the Windows experience by using several distinct folders.
- Open the Run window and type Shell:AppsFolder and then click Ok.
- You will find the applications on your device, choose the one you want to create a shortcut for, right-click on it and click Create Shortcut.
- Click Yes and you will find the shortcut on your desktop.


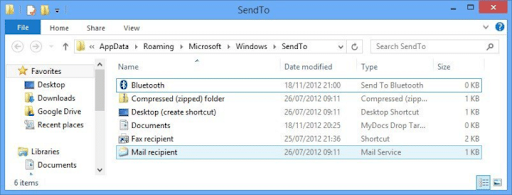
Using Shell:SendTo to add shortcuts to the Send to menu:
One of your options for a better experience using multiple distinct folders is the Shell:SendTo folder, which allows you to add additional options for the applications that appear in the Send to list.

You can benefit from this by:
- Add applications to the Send to list so that you can use them to send files and documents, which is a common use for this folder.
- Add applications to which you can send a file, such as images, in case you want to use an image on an application, so that you can use the Send to menu to insert the image on the application if the application is not in the Open with list.

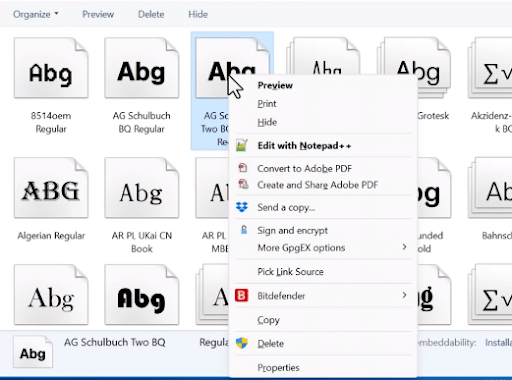
Control the fonts on your device using Shell:Fonts:
Using this folder you can see all the fonts on your device and have a look at them as well as control whether the font will appear to you on the app.
This is done by clicking on Hide if you do not want it to appear in the application and undoing this by clicking on Show, or Delete if you want to delete it permanently.
Use Taskbar Pinned Folder to control the taskbar:
As we mentioned, there are several distinct folders that can improve your experience on Windows, including the Taskbar Pinned Folder, by following this path on File Explorer: C:\Users\[Username]\AppData\Roaming\Microsoft\Internet Explorer\Quick Launch\User Pinned\TaskBar

You will find the applications or folders in the taskbar and from here you can delete or add any application or folder you want to add to the taskbar or change the shape of the application icon easily.