
Samsung Galaxy Note Edge Display Assembly Replacement
How to change the display assembly of Samsung GalaxyNote Edge / N915
Step 1 Remove the Galaxy Note Edge battery.

Step 2 Remove the back cover of your Galaxy Note Edge.
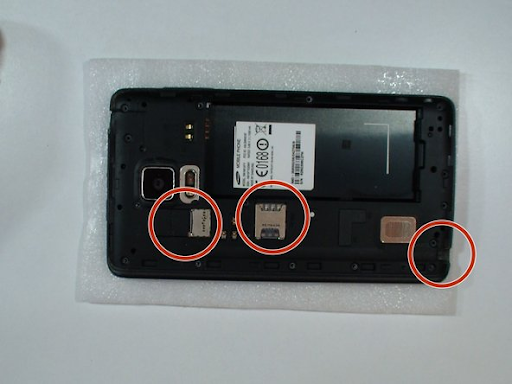
Remove the memory card, SIM card, and S Pen.
Remove the screws using a #00 Phillips screwdriver.
Using a plastic opening tool, remove the rear frame.


Step 3 Remove the Galaxy Note Edge 1 motherboard
Disconnect one by one:
Coaxial antenna cable (×2)
Home Button Flexible Cables
Flexible cable display
Flexible cable for pen sensor
Front camera flex cable


Step 4 Remove the Galaxy Note Edge 2 motherboard
Lift the connector on the back of the board to release the bottom of the motherboard.
Gently remove the logic board.


Step 5 Test the new part.
It is best to test the new replacement part before installing it.
Move the power button/speaker flex cable.
Install the motherboard.
Test the screen.
To prevent damage to the rear frame before testing.


Step 6 Check the thermal pads
Check the quality of the thermal pads (if the spare part is not original).
If necessary, use the thermal pads from the old set.

Step 7: Transferring All Parts from the Old Display Assembly - Part 1
Enter wisdom here.


Step 8 Remove the Galaxy Note Edge charging port flex assembly.
Remove the black Phillips screw,
Charging port board,
Disconnect the flex cable of the home buttons.
And coaxial antenna cable (x2).
Use hot air and a plastic opening tool to remove the charging port flex assembly.


Step 9 Reassemble
To reassemble your device, follow these instructions in reverse order.

To reassemble your device, follow these instructions in reverse order.